How to install the B7 backup camera system
Installing a new system can be a daunting task, but with the right guidance, it can be a smooth and successful process. In this blog post, we will provide you with step-by-step instructions on how to install the B7 system, ensuring that you can enjoy its benefits in no time.
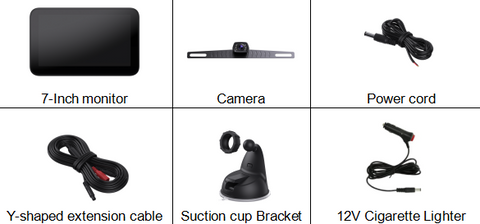
Product List
Video:How to Install a B7 Backup Camera and Monitor on a Ford Police Interceptor Utility Explorer (2011-2019)
Method 1: Powered by the reversing light (The system will be activated when reversing.)
Step 1: Mount the Camera
Using a Phillips head screwdriver, remove each of the screws holding your rear license plate in place. Then, pull the plate off and set it aside.
Note: Make sure you place the screws in a safe place so you don’t lose them.

Step 2: Mount the Camera
Place the camera on the screw holes it will be placed, securely attach the camera. Make sure it is aligned properly and tightened to prevent any movement or vibrations while driving.
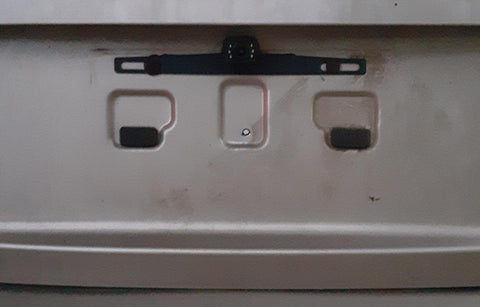
Step 3: Run the cable into the trunk.
Run the camera cable from outside of the car into the trunk. If there is already a hole or passageway to allow you to route the wire from the camera into the interior space of the trunk or you can route the camera wire underneath the license plate and over the bottom edge of the trunk lid to get it the wire inside the trunk. This way, you can avoid the need to drill a hole in your vehicle. If you cannot route the camera wire the way, you need to drill a hole.
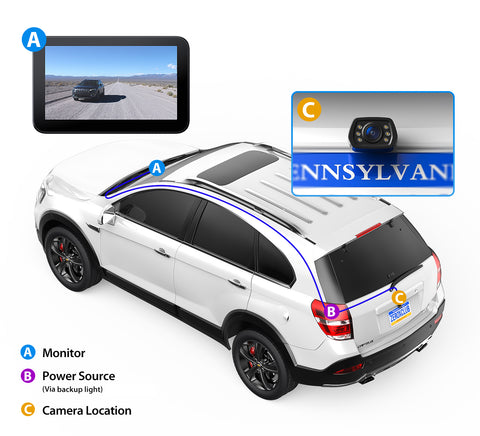
Step 4: Route the Wiring
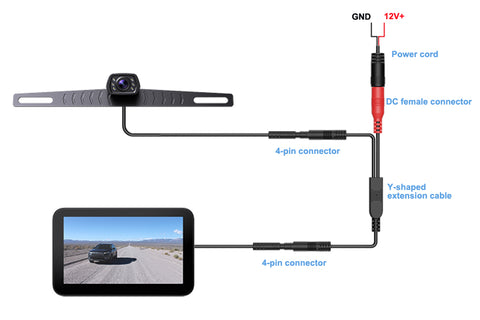
- Once the camera cable is inside the trunk space, then attach it to the 4pin connector of the Y-shaped extension cable.
- Attach power cord to the red DC female connector of the Y-shaped extension cable.
- Locate your car’s reverse light wires and you can connect the wire to the car's reversing light wire. Usually, the black one is ground and the other one is the 12 volt positive wire. (In the USA, the positive wire is usually white.) Make sure your connections are solid.
- Run the other end(single 4 pin connector)of the Y-shaped extension cable all the way to the cab space.
Note:It is recommended to consult the specific user manual provided by the manufacturer of your vehicle for going find the power location.
Note: Do not leave the ignition of the vehicle on when not testing.
Step 5: Install the monitor
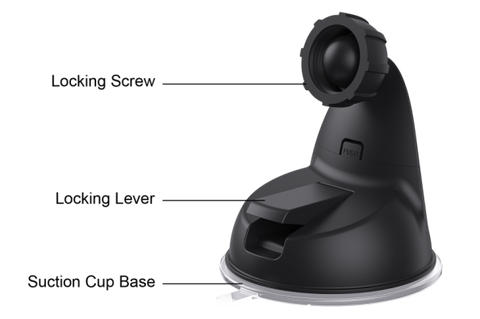
- Place the locking screw and suction cup on the back of the monitor, then tighten the locking screw to secure the monitor.
- Clean the area on the windshield or dashboard where the suction cup base is to be mounted. Press the suction cup base against the windshield or dashboard and move the locking lever towards the suction cup base.
- Adjust the monitor to the desired viewing angle.
- Connect the monitor cable to the 4pin connector.
Step 6: Test the system
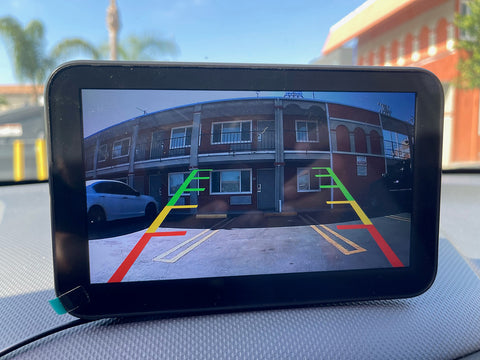
Once all the connections are made, test the system to make sure everything works. turn on your vehicle and engage the reverse gear. The monitor should display a clear view from the backup camera. Test the system by reversing your vehicle and ensuring that the camera provides accurate visibility.
Method 2: Powered by the cigarette lighter (The system will turn on continuously.)
Step 1: Install the monitor
- Place the locking screw and suction cup on the back of the monitor, then tighten the locking screw to secure the monitor.
- Clean the area on the windshield or dashboard where the suction cup base is to be mounted. Press the suction cup base against the windshield or dashboard and move the locking lever towards the suction cup base.
- Adjust the monitor to the desired viewing angle.

Step 2: Install the camera
Using a Phillips head screwdriver, remove each of the screws holding your rear license plate in place. Then, pull the plate off and set it aside.
Note: Make sure you place the screws in a safe place so you don’t lose them.

Step 3: Mount the Camera
Place the camera on the screw holes it will be placed, securely attach the camera. Make sure it is aligned properly and tightened to prevent any movement or vibrations while driving.
Step 4: Run the canera cable into the trunk.
Run the camera cable from outside of the car into the trunk. If there is already a hole or passageway to allow you to route the wire from the camera into the interior space of the trunk or you can route the camera wire underneath the license plate and over the bottom edge of the trunk lid to get it the wire inside the trunk. This way, you can avoid the need to drill a hole in your vehicle. If you cannot route the camera wire the way, drill a hole into the plate area by the cable so you can run it into the hatch. Ensure that it is hollow on the other side and you're not drilling into anything you shouldn't be. The hole doesn't have to be very big, just large enough for the cableUse zip ties to secure the wiring along the way, keeping it neat and organized.
Step 5: Route the Wiring
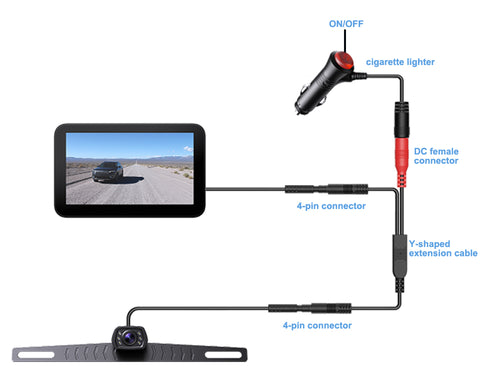
- Once the camera cable is inside the trunk space, then attach it to the 4pin connector of the Y-shaped extension cable.
- Attach the camera cable to the single 4pin connector of the extension cable.
- Run the other end (the 4pin connector and a DC female connector) of the extension cable all the way to the cab space.
- Connect the monitor cable to the 4pin connector
- Attach the cigarette lighter switch that is included with the kit to the red DC female connector of the Y-shaped extension cable.
Step 6: Test the system
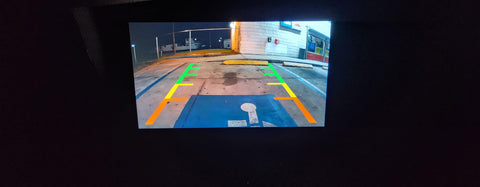
Plug the car charger into the car socket and test the system to make sure everything works.
By following these simple steps, you can successfully install the B7 backup camera system in your vehicle. Remember to refer to the user manual for any specific instructions related to your vehicle's make and model. Enjoy the added safety and convenience that the B7 backup camera system brings to your driving experience!
